Payment Gateway
Payment Gateway
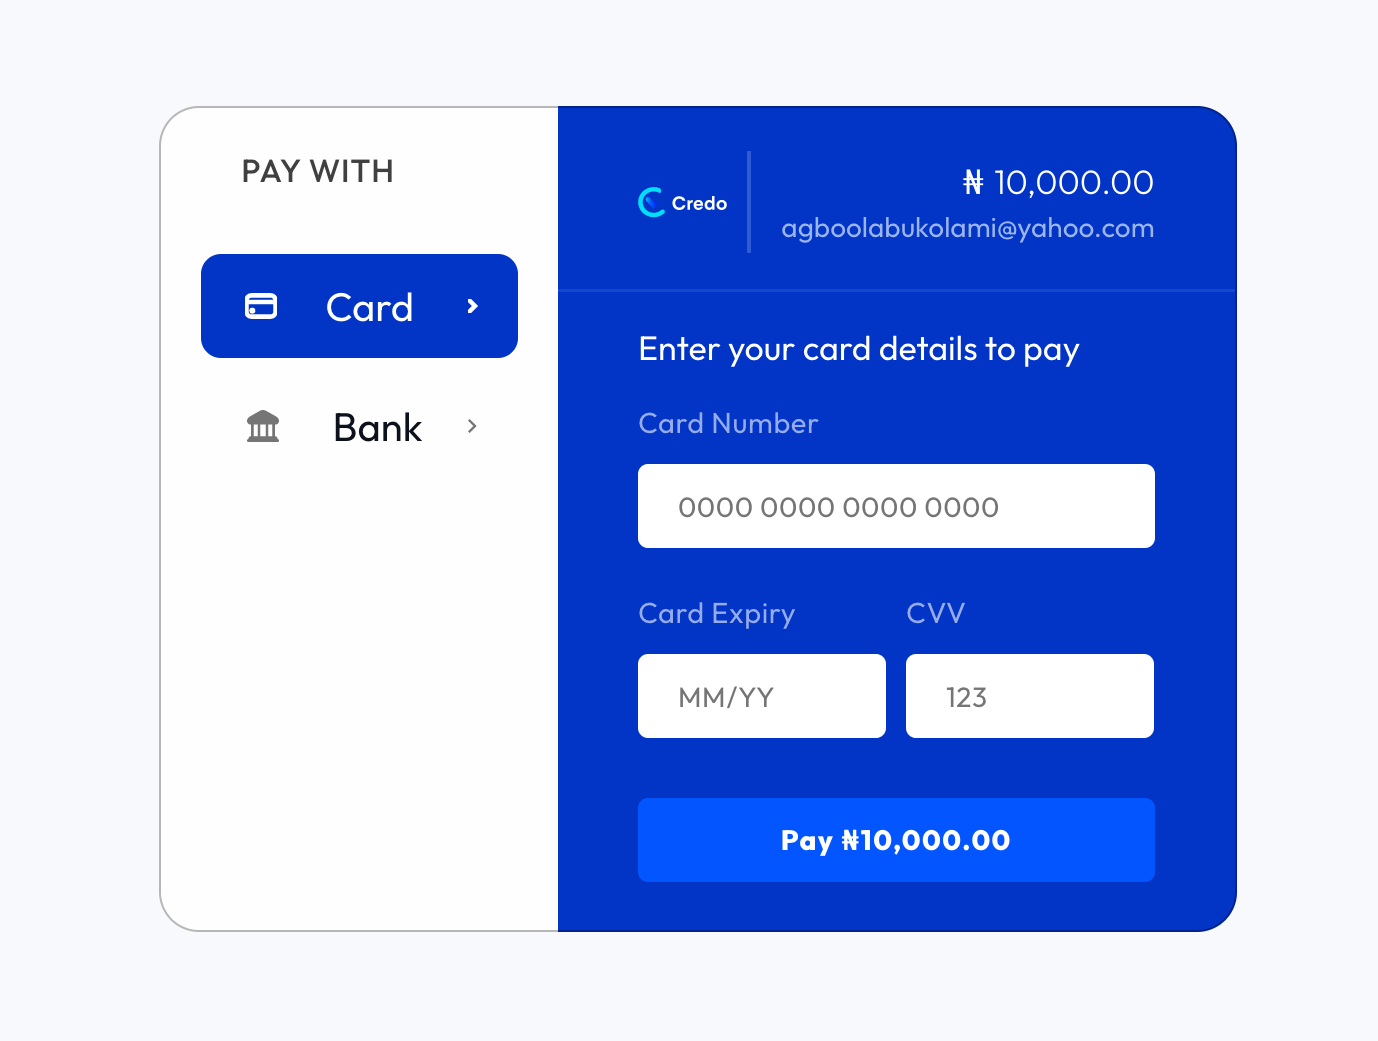
For most use cases, this is where the payment journey begins. Need to collect a payment from a customer? Submit the customer and order details, and we'll return a link to a secure prebuilt payment page hosted on Credo that you can redirect your customer to for them to make payment.
Step 1 : Order Initiation
Customer visits your app/website, selects desired services/products & then proceeds to checkout.
Step 2 : Start a Payment / Initiate Payment
You'll start the payment transaction by calling the POST /transaction/initialize. You give us details about the customer and
order, we'll store the transaction and return details to you.
Protocol: HTTPS Request
Method: POST
Content: Type: Application/JSON
Header: Authorization: api-public-key
Endpoint: transaction/initialize
- Request (JS)
- Request (PHP)
- Response
{
"amount": 15000,
"bearer": 0,
"callbackUrl": "https://example.com/",
"channels": [“card”, “bank”],
"currency": "NGN",
"customerFirstName": "John",
"customerLastName": "Wick",
"customerPhoneNumber": "2348032132100",
"email": "john.wick@credocentral.com",
"metadata": {
"bankAccount": "0114877128",
"customFields":[ {"variable_name": "gender", "value": "Male", "display_name": "Gender" } ]
},
"//reference": "mTL022NzzQ0 - This must be Unique, if not present we will generate one",
"//serviceCode": "201220045mG7mTL022zQ09 - If you have dynamic settlement service setup"
}
<?php

# STEP 1 -> PAYMENT INITIALIZATION

$demoBaseUrl = 'https://api.credodemo.com/transaction';
# live Base url = https://api.credocentral.com
$publishableKey = '0PUB0312poF5J29cruYr0ZO1tcAh6V0J';

$data = array(
    "amount" => 10000, # amount is in kobo
    "bearer" => 0,  # who bears the fee; 0 = customer, 1 = merchant
    "callbackUrl" => "http://localhost/credointegration/verify.php", # set this to your receipt URL as the case may be
    "channels" => array("card", "bank"),
    "currency" => "NGN",
    "customerFirstName" => "John",
    "customerLastName" => "Wick",
    "customerPhoneNumber" => "2348032132100",
    "email" => "john.wick@credocentral.com",
    # metadata is any extra info you want to record with the transaction
    "metadata" => array(
        "bankAccount" => "0114877128",
        "customFields" => array(array("variable_name" => "gender", "value" => "Male", "display_name" => "Gender"))
    ),
    # "reference"=> "mTL022NzzQ0", # This must be Unique, if not present we will generate one
    # "serviceCode"=> "201220045mG7mTL022zQ09" # If you have dynamic settlement service setup
);

$transaction = curl_init($demoBaseUrl . "/initialize");

curl_setopt($transaction, CURLOPT_POST, true);
curl_setopt($transaction, CURLOPT_POSTFIELDS, json_encode($data));
curl_setopt($transaction, CURLOPT_RETURNTRANSFER, true);

curl_setopt($transaction, CURLOPT_HTTPHEADER, [
    "Authorization: " . $publishableKey,
    "Content-Type: application/json"
]);

$response = curl_exec($transaction);
curl_close($transaction);

# STEP 2 -> REDIRECT CUSTOMER TO CREDO GATEWAY FOR PAYMENT

$responseData = json_decode($response);

if ($responseData->status == 200) {
    /*
     * perform other logic like storing the payment information
     * on your database.
    */
    header("Location: " . $responseData->data->authorizationUrl);
    die();
}
{
  "status": 200,
  "message": "Successfully processed",
  "data": {
    "authorizationUrl": "https://www.credodemo.com/checkout/Sfhx00BA4801Zk1T47wf",
    "reference": "201220045mG7mTL022zQ09",
    "credoReference": "Sfhx00BA4801Zk1T47wf"
  },
  "execTime": 4.64879297,
  "error": []
}
Step 3 : Redirect your customer to our payment page
Now that you've notified us of the transaction, we're ready to handle the payment. Redirect your customer to the authorizationUrl returned from the initialize/payment endpoint. That link points to a secure payment page hosted by us, where the user can make payment. We support card and direct bank payments.
Step 4 : Confirm transaction status & redirect customer back to merchant site
Immediately customer makes payment, Credo processes the payment and sends a response with the payment status to the CALLBACK_URL provided in the request payload.
callbackUrl?status=0&errorMessage=Approved&transRef=Sfhx00BA4801Zk1T47wf&transAmount=150.00¤cy=NGN&reference=201220045mG7mTL022zQ09
Important: You should store the returned transRef in your database against the transaction. That way, if you need to resolve any issues in the future, you can easily use your transRef to verify the state of the transaction.
Please note that: We redirect to you even if the payment failed, so it’s advised you verify that the transaction was indeed successful when unsure before completing the order. Call the GET /transactions/{transRef}/verify endpoint to get the current state of the transaction
After a successful payment you can choose to redirect your customer to a page you want like a confirmation or success page. As long as you have updated your callbackUrl with the page address, your customers will be direct there.
Step 5 : Complete the order
Once you've confirmed the transaction was a success, you're ready to go! You can thank your customer, send an order confirmation email, and ship the products.
Step 6 : Wait for settlement.🤑
The last thing is getting the money into your bank account. To do so, make sure you've added a settlement bank account via your Credo merchant dashboard.
Once we verify the account, all that's left is to profile a settlement payout schedule from various available options i.e. daily, weekly, monthly etc. on the dashboard. Choose one, sit back and relax and the money will show up in your account soon.